Interpolate
Interpolate spectra.
Inputs
- Data: input dataset
- Points: a reference data set
Outputs
- Interpolated Data: aligned dataset
The Interpolate widget enables you to align datasets with different wavenumbers. It has automatic interpolation or you can provide the reference data set to align with.
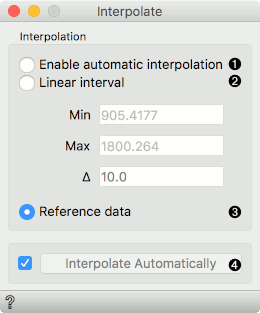
- Enable automatic interpolation: creates a new domain, which consequently enables interpolation of values on test data.
- Linear interval:
- Min: minimum cutoff
- Max: maximum cutoff
- Delta: the difference between the cutoffs
- Reference data: the data is aligned to the reference data
Examples
The first example shows how to use Interpolate to align the train and test data set of spectral data. We will use collagen-interpolate-train.tab to train our model. Let us load the data with the File widget. Then connect it to Test & Score and add a learner, say, Logistic Regression. The scores in Test & Score look great.
Now we would like to test on a separate data set, which has different wavenumbers. We will use collagen-interpolate-test.tab for testing. If we connect this data directly to Test & Score and select the option Test on test data, our results will be horrible. What has happened?
Well, Orange couldn't find any similarity between the two datasets, since the wavenumbers differ. This is why we need to interpolate first, to align the two data sets to the same scale. I will insert the Interpolate widget between File - Test and Test & Score. I will also provide the File - Train as the reference data set and select this as an option in Interpolate. Now the results in Test & Score are much better.
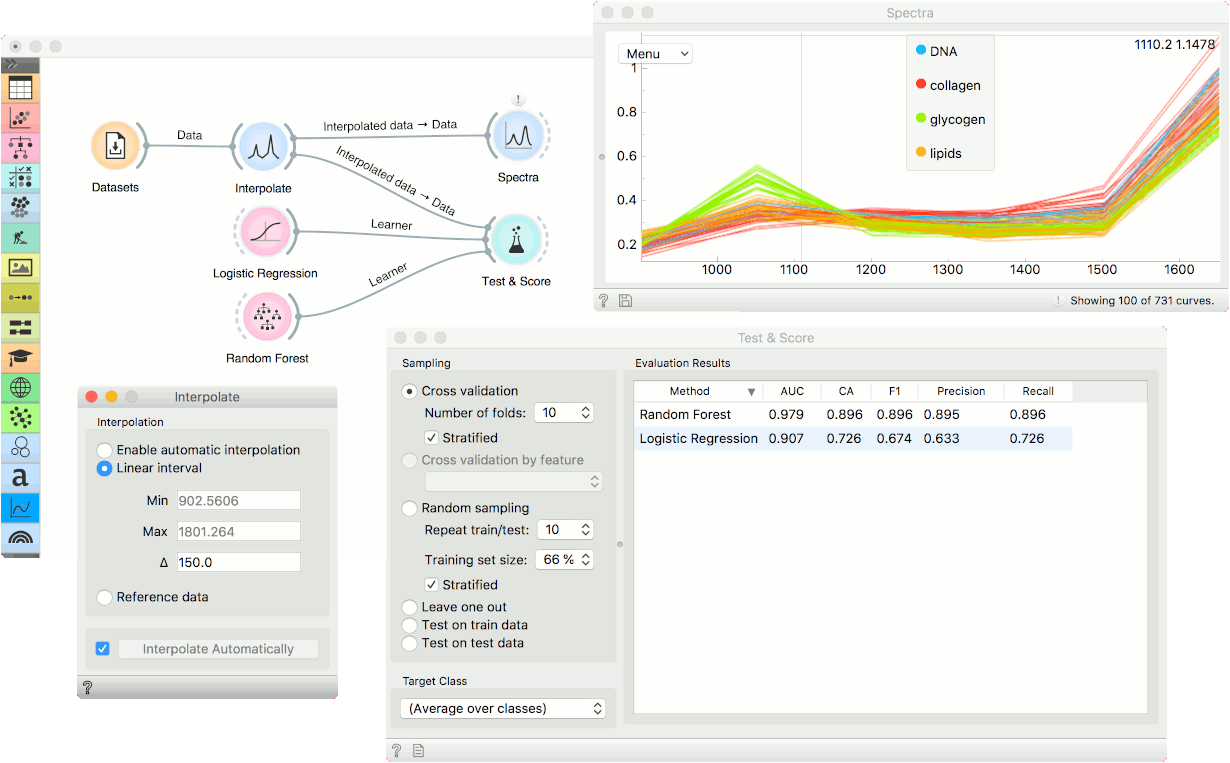
The second use case is a tad more advanced. We will use Interpolate to determine how much granularity we can afford to lose in our measurement. Say we wish to perform a diagnostic much faster. Could we measure only every 10th wavenumber? Or every 50th?
We will use the Liver spectroscopy data from the Datasets widget. Connect the widget to Interpolate and use the Linear interval option. The delta is set to 10. Then observe the performance of predictive models in Test & Score. Use any classifier you want; we chose Logistic Regression and Random Forest. The AUC is quite high.
Now, set the delta to, say, 50 and observe how the AUC changes. Not much. Try setting the delta to 100 or 150. The AUC is still high, which means the classifier is stable even at such a low resolution. This is a nice way to determine how much granularity you can afford to lose to be still able to achieve a good separation between class values.