installation, anaconda, navigator
Installing with Anaconda Navigator
Ajda Pretnar
Feb 24, 2020
We are fortunate enough to be featured on the front page of Anaconda Navigator, a graphical user interface for conda package management. Orange has been a conda package for some time now, since this is the easiest way to provide pre-compiled packages for Windows. And since most of our user base uses Windows, this was the way to go.
If you are an avid Anaconda user and you wish to install Orange with Anaconda Navigator, there are some steps you need to take to ensure everything works correctly. First, install Orange in the home screen. Once Orange is installed, it will appear at the top.
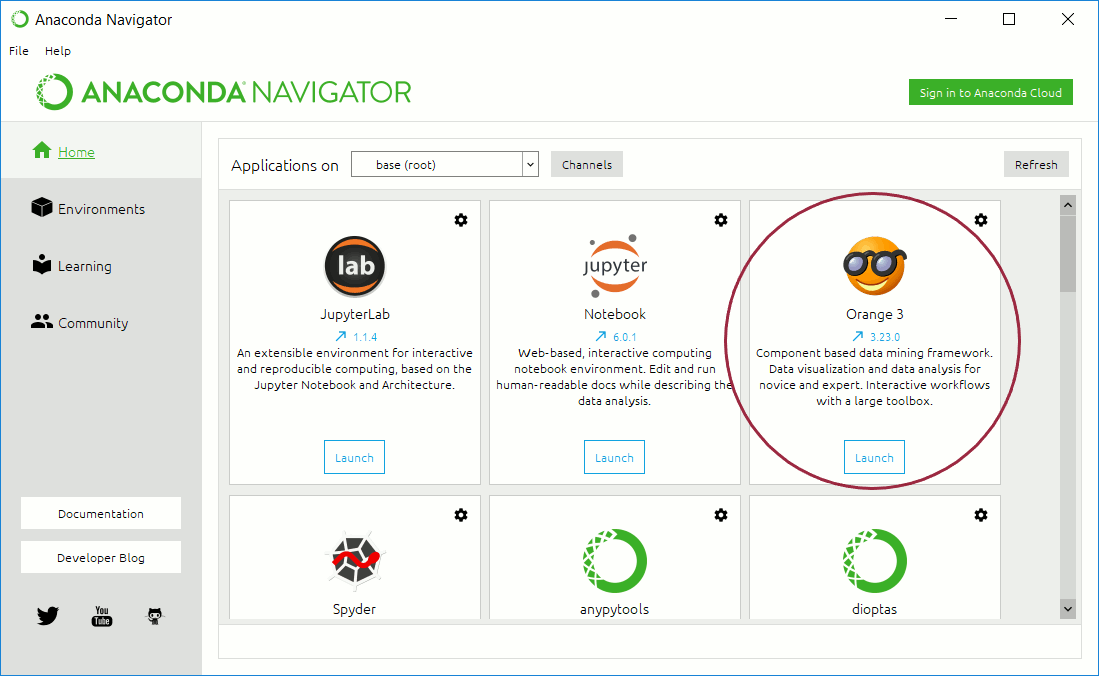
Next, go to the Environments pane. You likely see only base (root) environment. Environments in Python are special 'containers' that isolate all your dependencies for different project. You can create a new environment called 'Orange' to keep everything Orange-related separate from your base environment. Click Create to make a new environment and follow instructions.
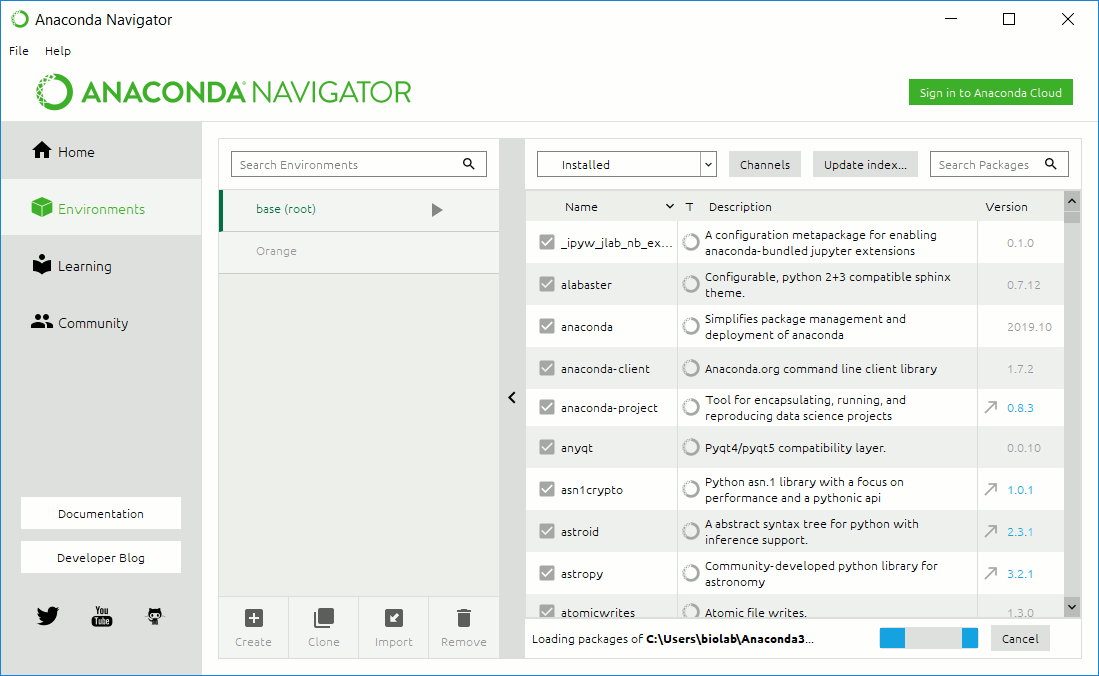
Here, we will use base, but the procedure is the same for any other environment. Select the environment you wish to set. In the upper right, select Channels. You should see defaults in your options.
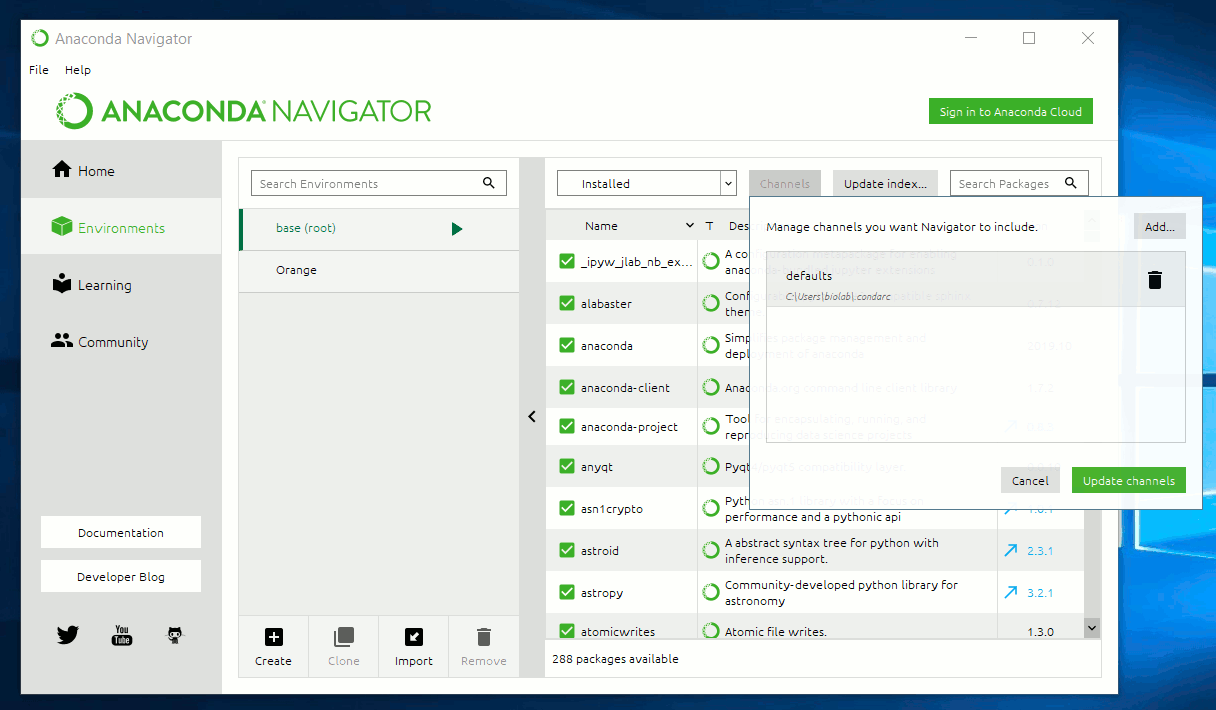
In the upper right, select Add..., then type conda-forge. Conda-forge channel is where the most recent versions of Orange and its add-ons live. Click Update channels once you have added the conda-forge channel.
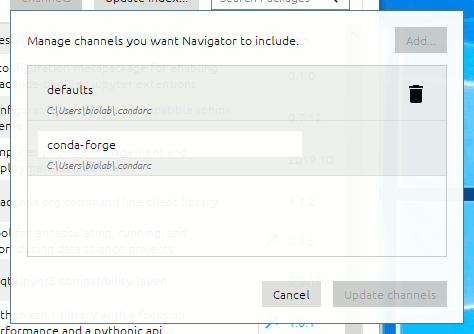
That's it. Your channel is set. Now you can update Orange to the latest version and use add-on that require pre-compiled packages, such as Text, Network, and so on.
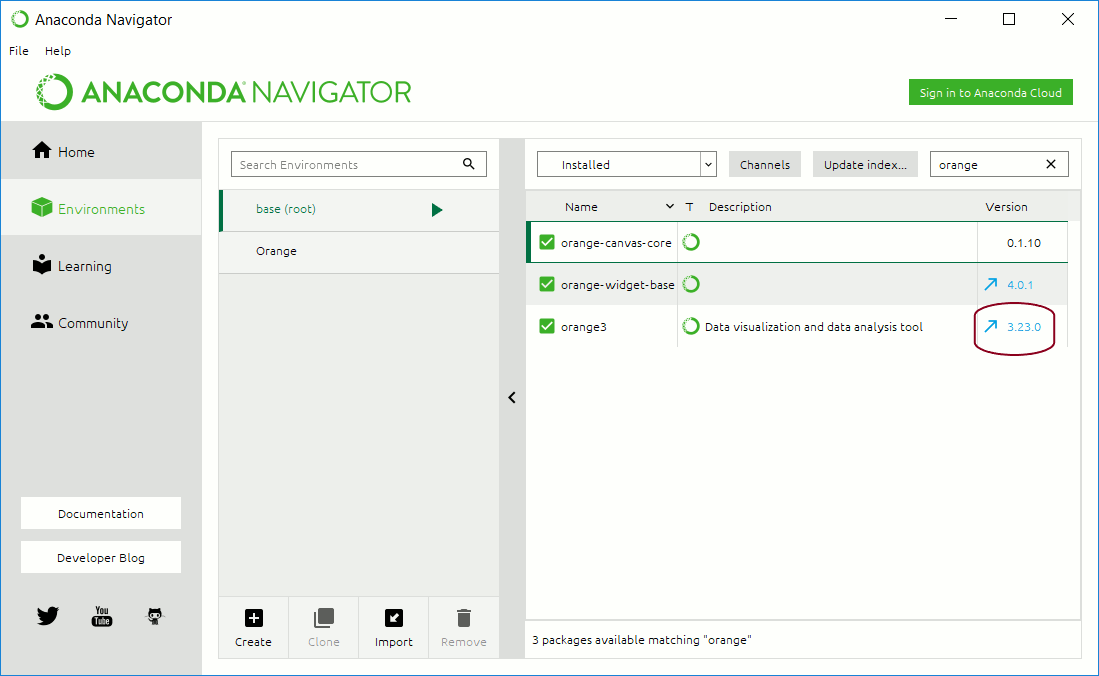
Make sure to regularly update Orange to get the latest bug fixes and features.